How to...Baby Safe Amigurumi Eyes
Lately I've been doing a lot of buddies for babies. The safety eyes used for amigurumi are hard and the baby can get hurt, these buddies need to be completely soft.
I tried out several ways of making baby safe amigurumi eyes. Some methods I didn't like the end result and others weren't consistent.
The following methods are what I came up with. =)
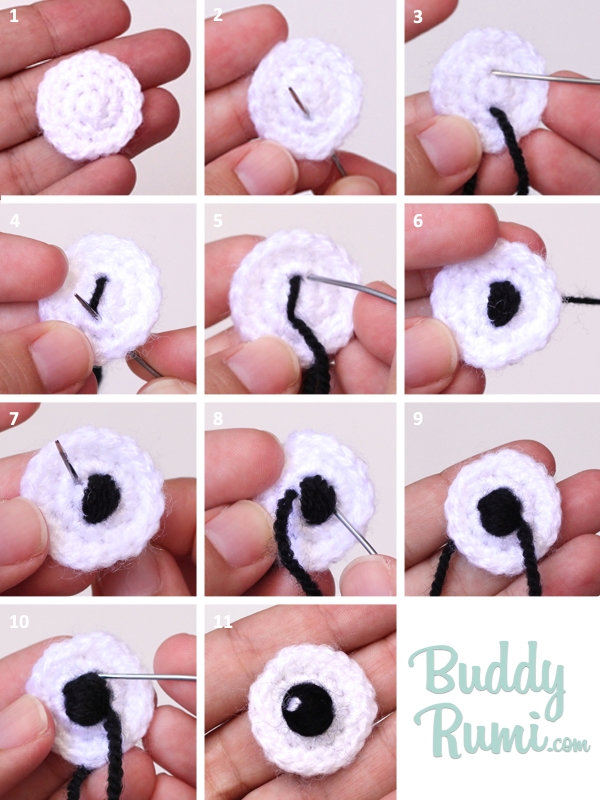
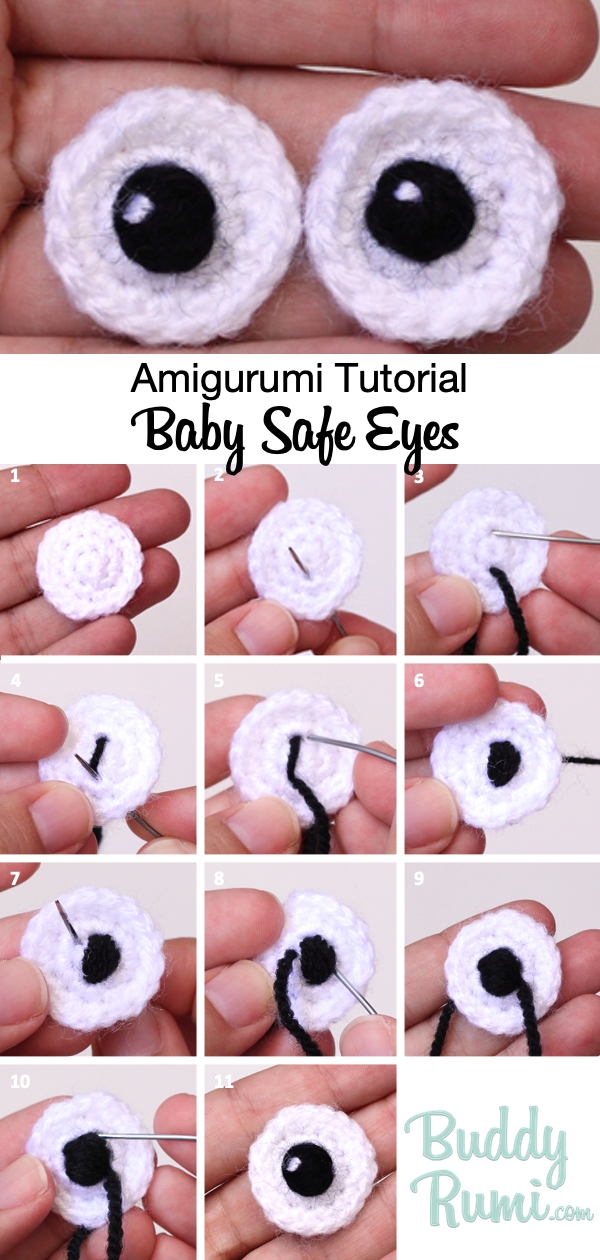
1. The eyes for my buddies usually have a white background, but you can use the same techniques directly on your amigurumi. Make sure you are using yarn made specific for babies.
2. Insert the needle in a space on top of the first round of the white background. Secure the tail in the back.
3. Insert the needle, going to the back, in a space opposite to the first one.
4. Insert the needle, from the back, in the same space as in Step 2.
5. Insert the needle, to the back, in a spot a little bit to the side of the space you used in Step 3.
6. Repeat Steps 4 and 5 until a majority of the eye is covered.
7. Insert the needle, from the back, in a spot where the eye isn't covered already. Change directions, if before you were working vertically, now work horizontally.
8. Insert the needle, to the back, into a space opposite to the one in Step 7.
9. Repeat Steps 4 to 6 until the center is completely covered.
10. Make small stitches around the black yarn to make it rounder.
11. With a fine weight white yarn, sew a few stitches on top of the black yarn to give more "life" to the eyes.
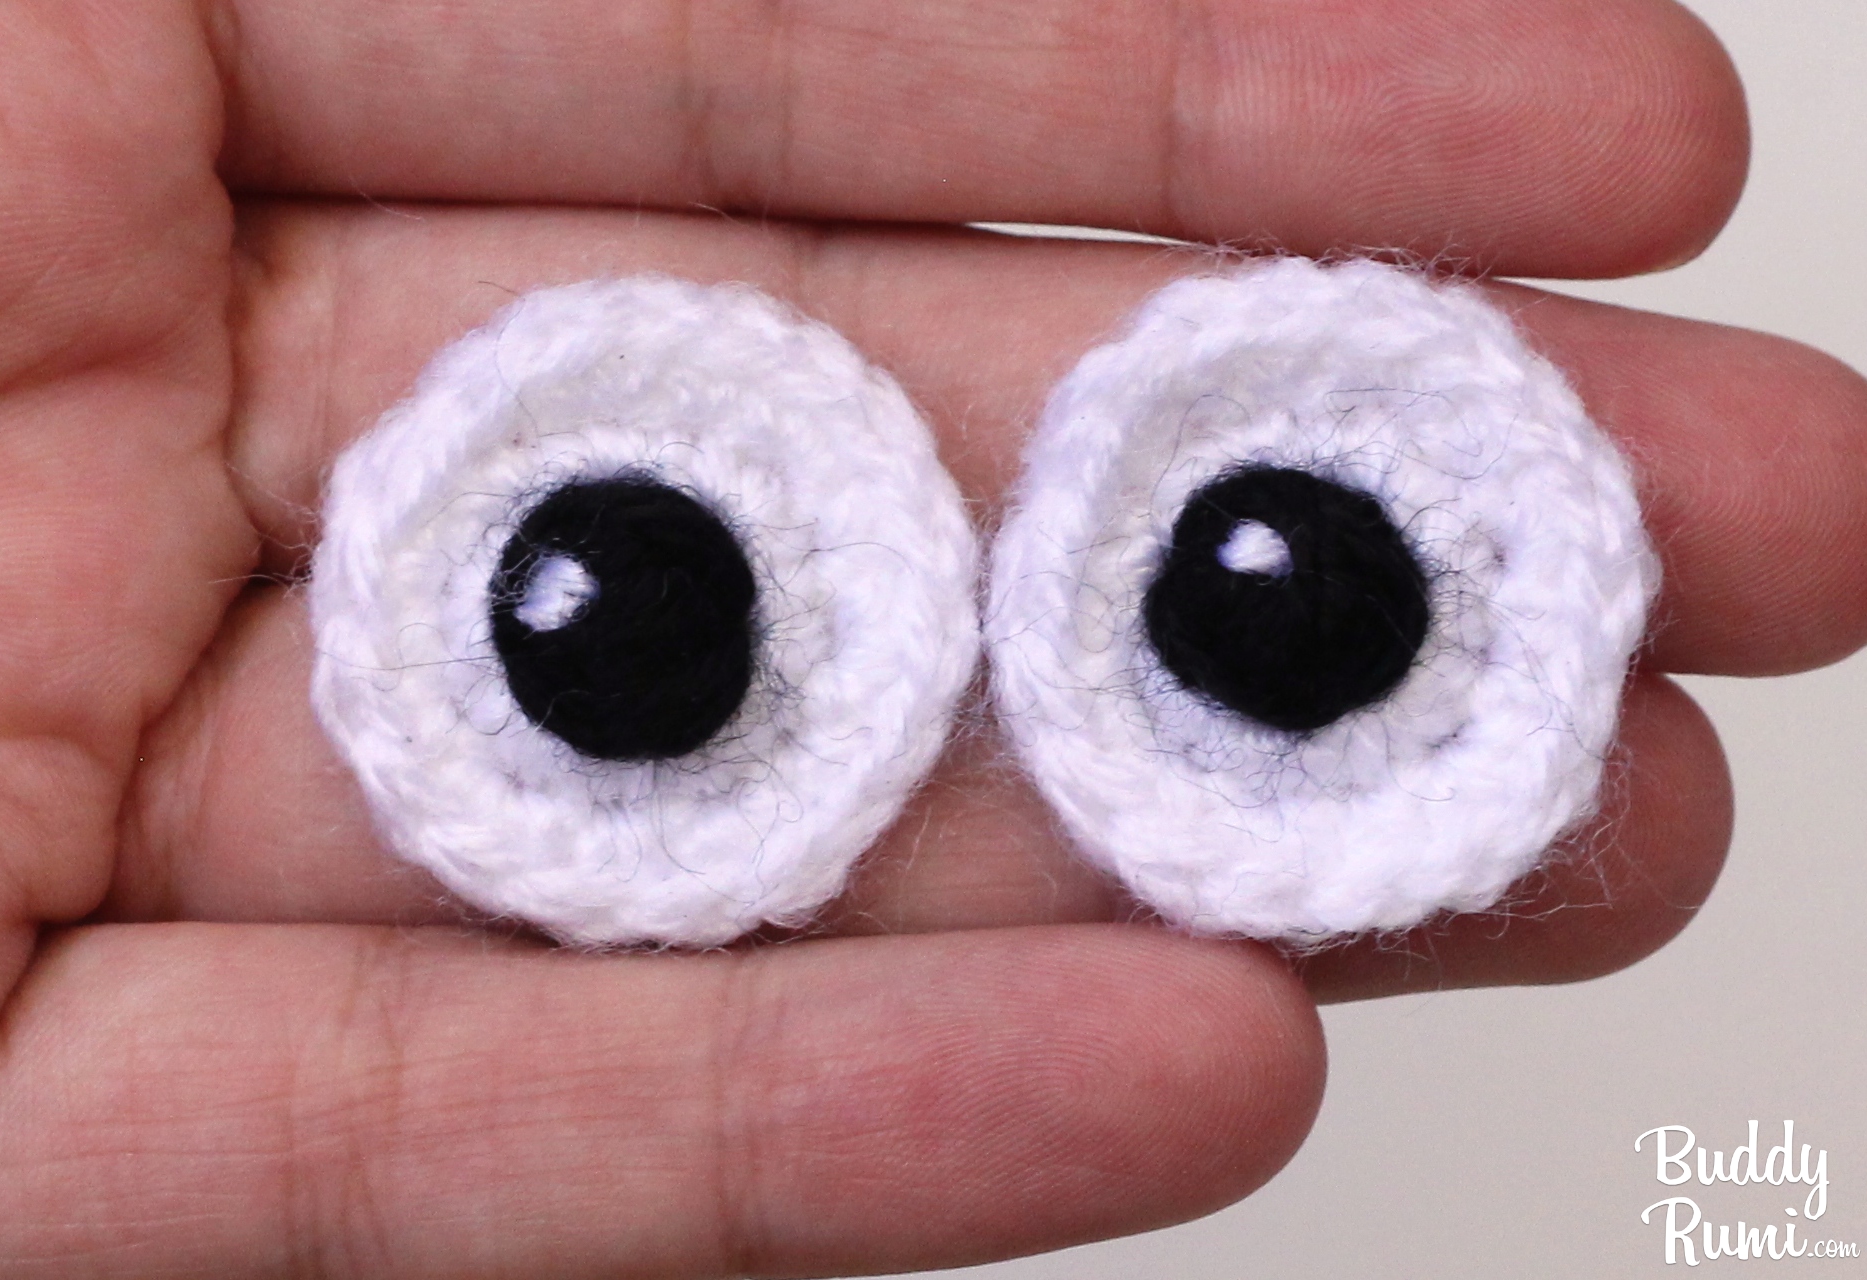
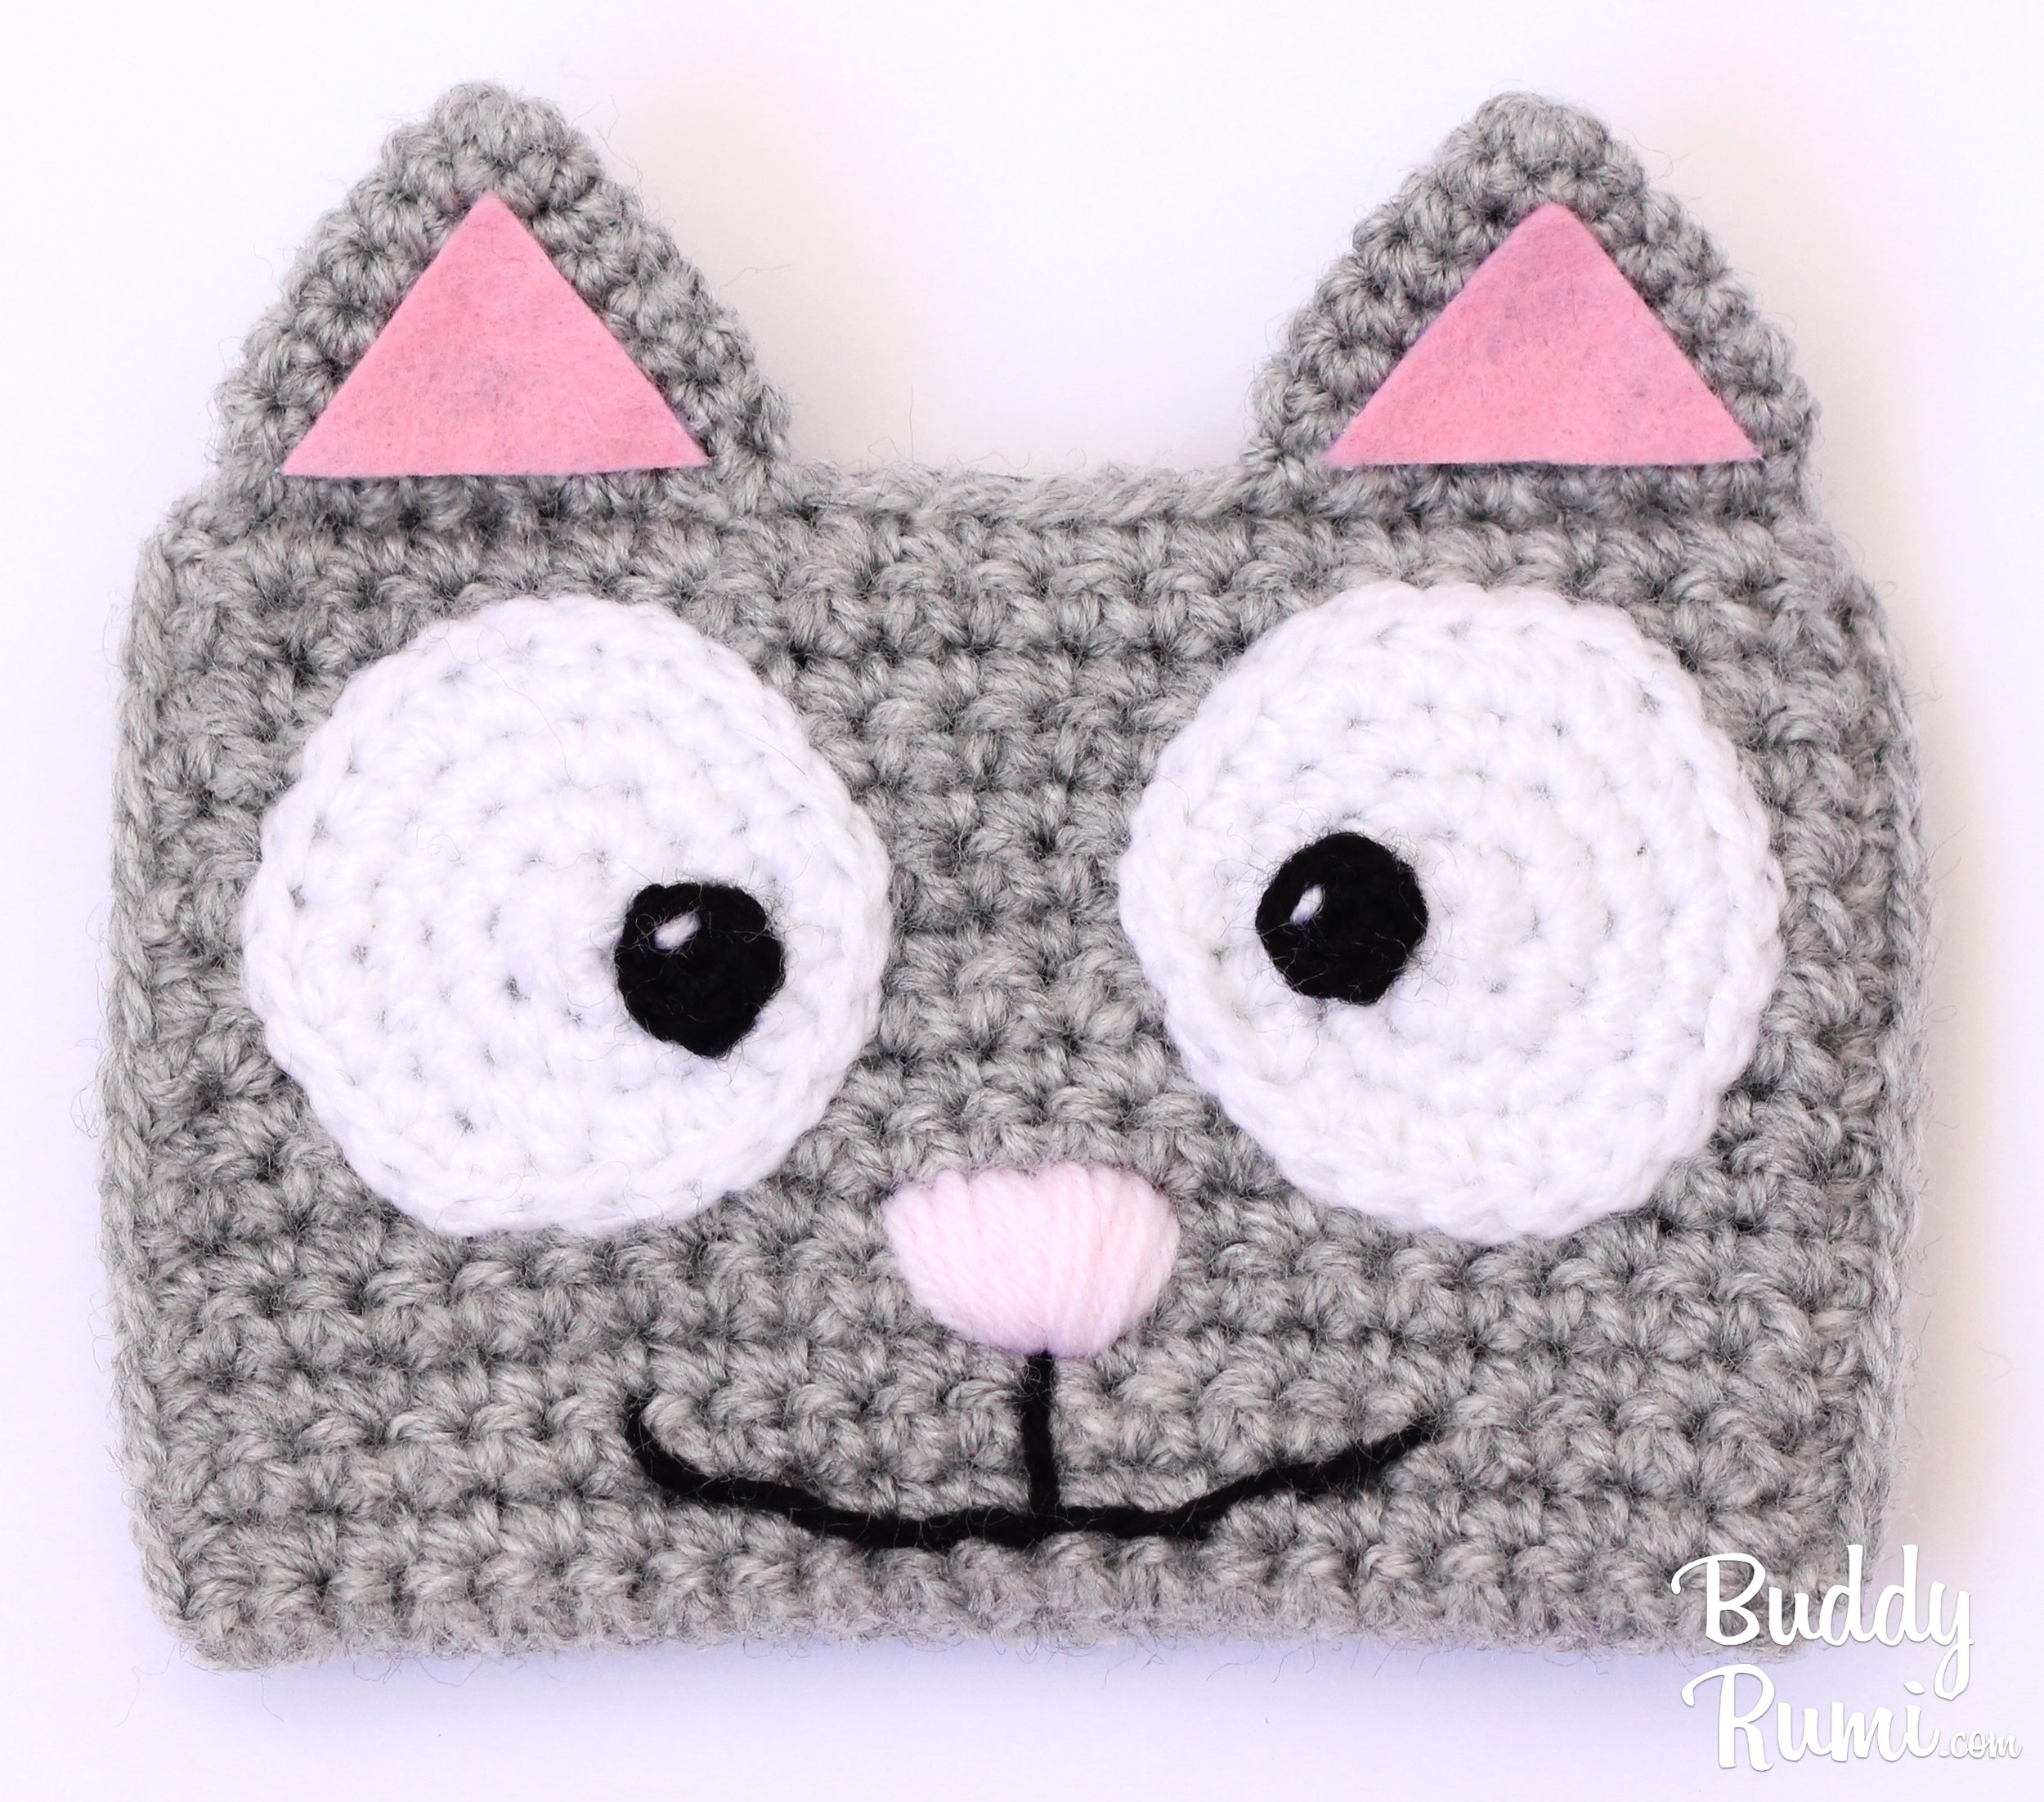
With this method I can have soft eyes that are around 9mm across which is the size that I use the most.
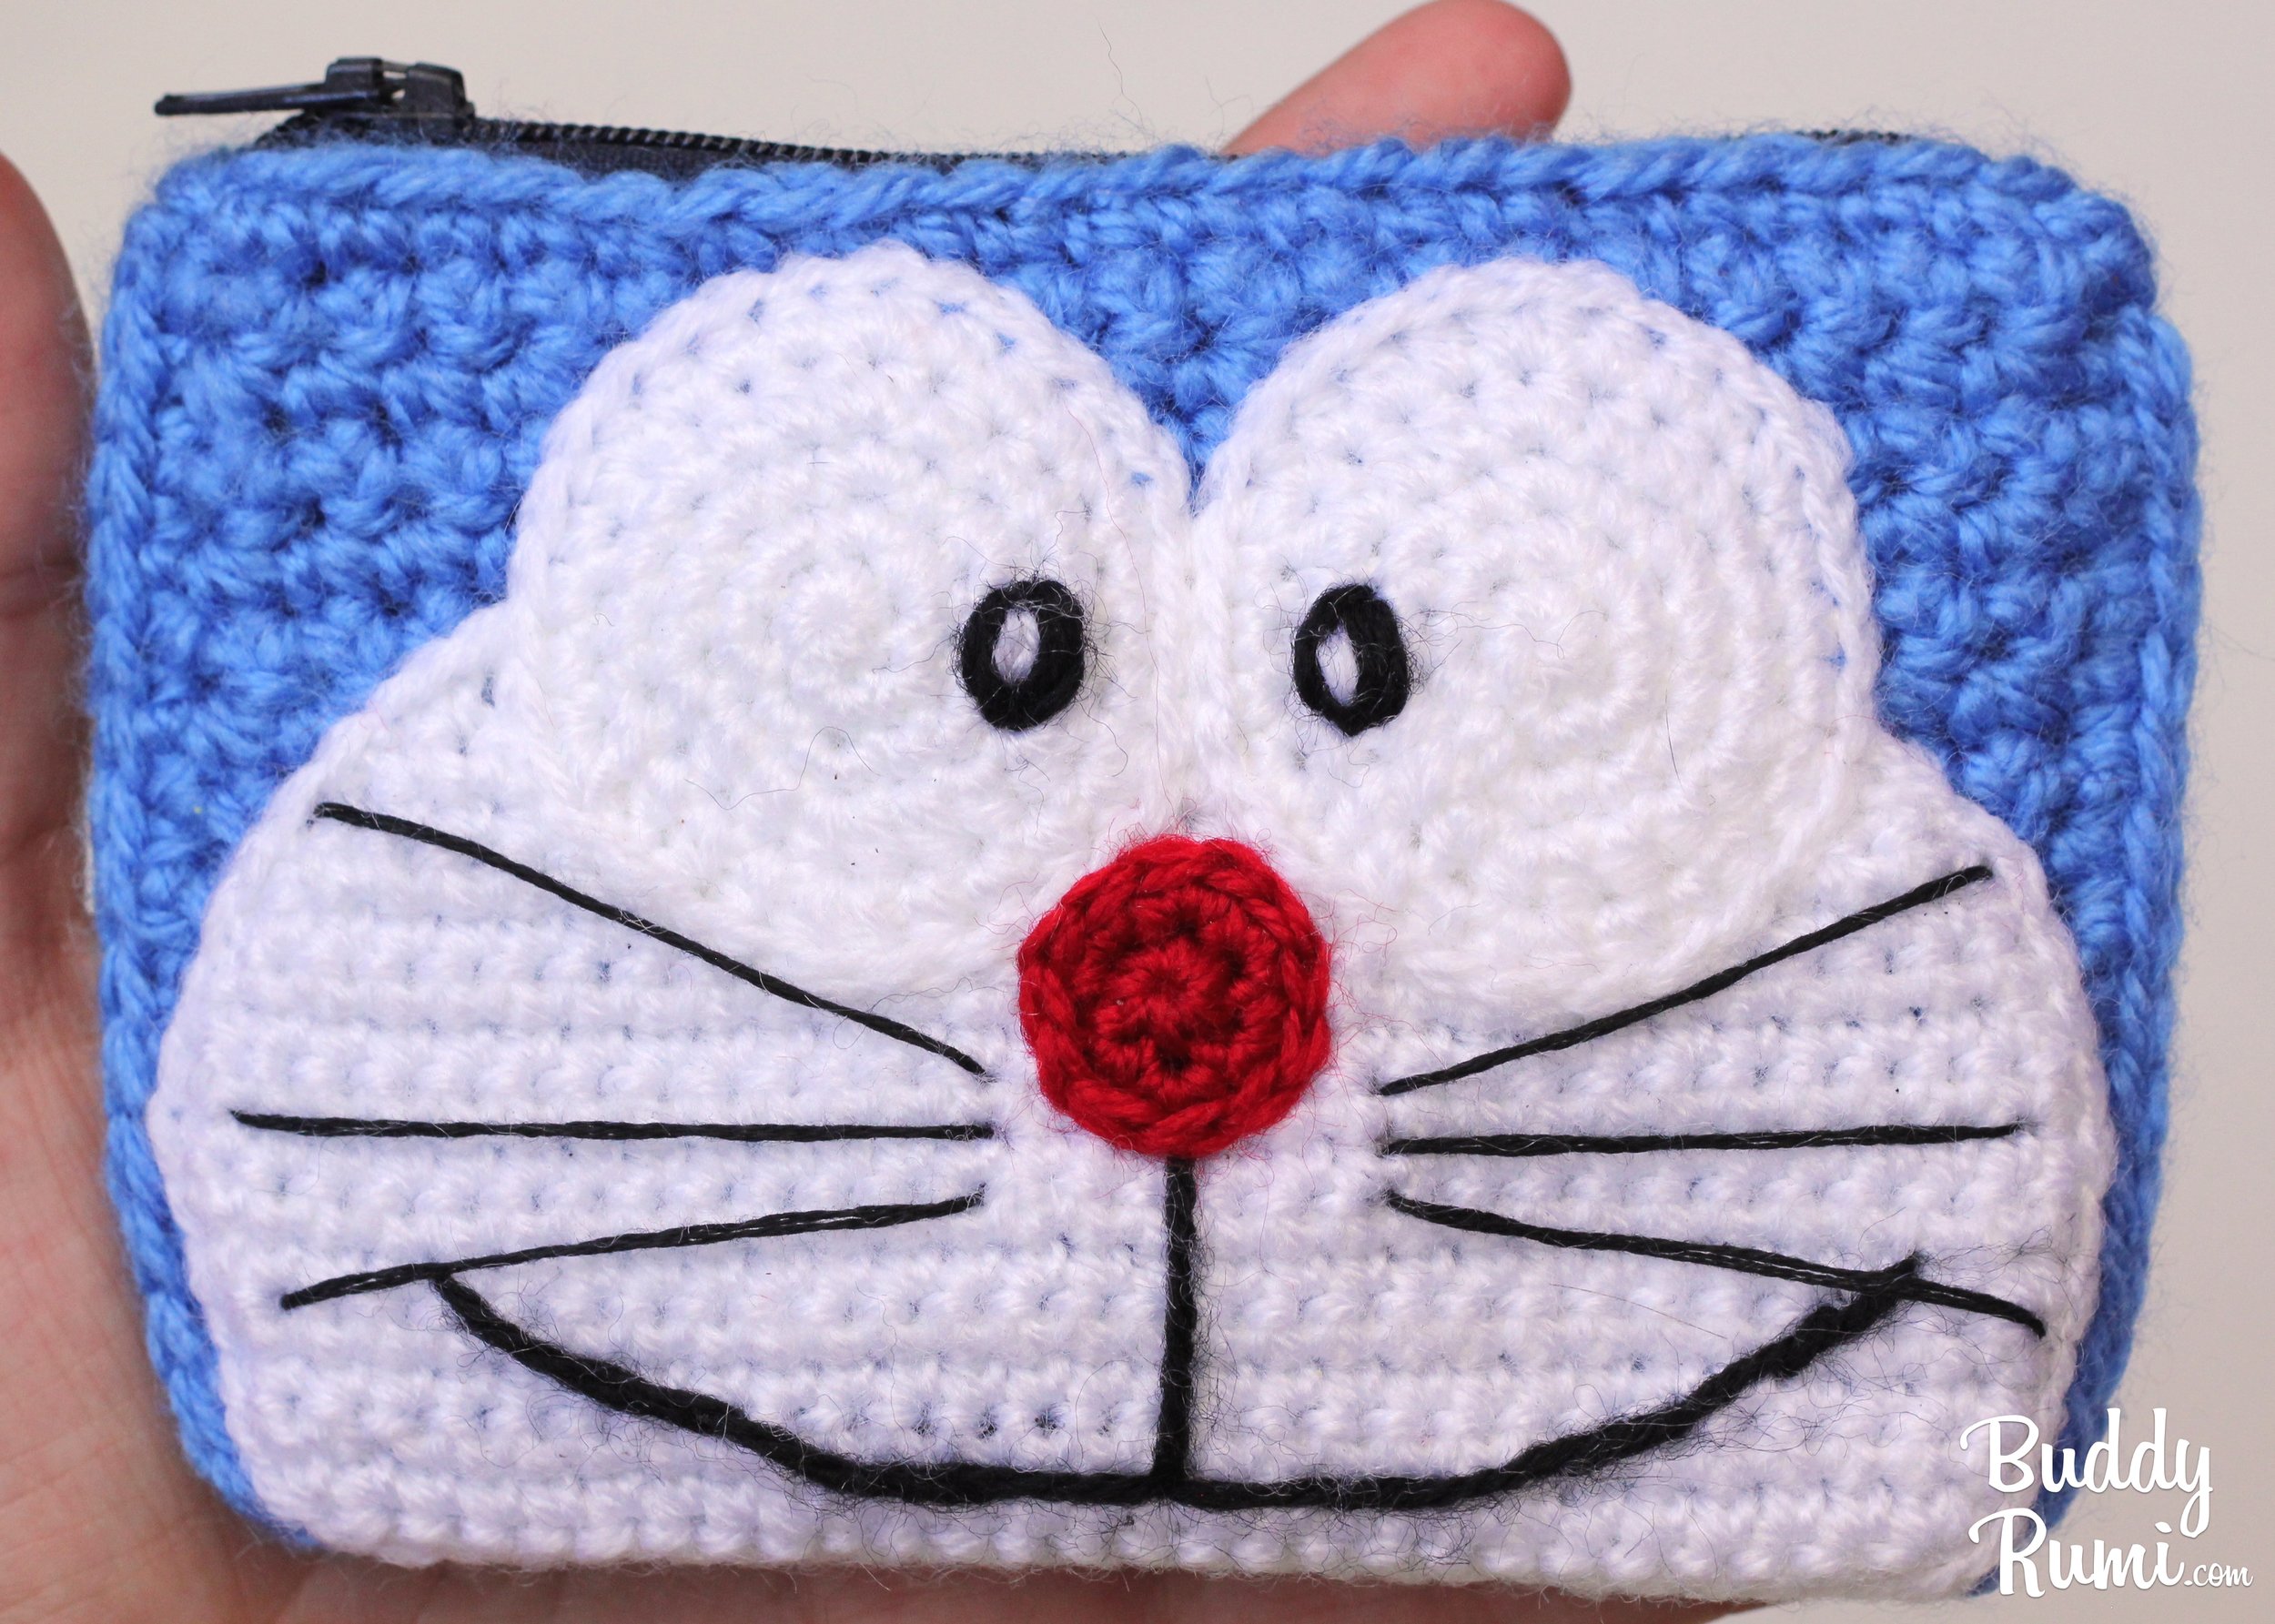
Here I used the same technique off center of the white background. To give the pupil the oval shape I made vertical stitches only, with the one in the center being the taller one.
The second method I like to use is to simply crochet the pupil. I usually use this method for buddies that have bigger eyes.
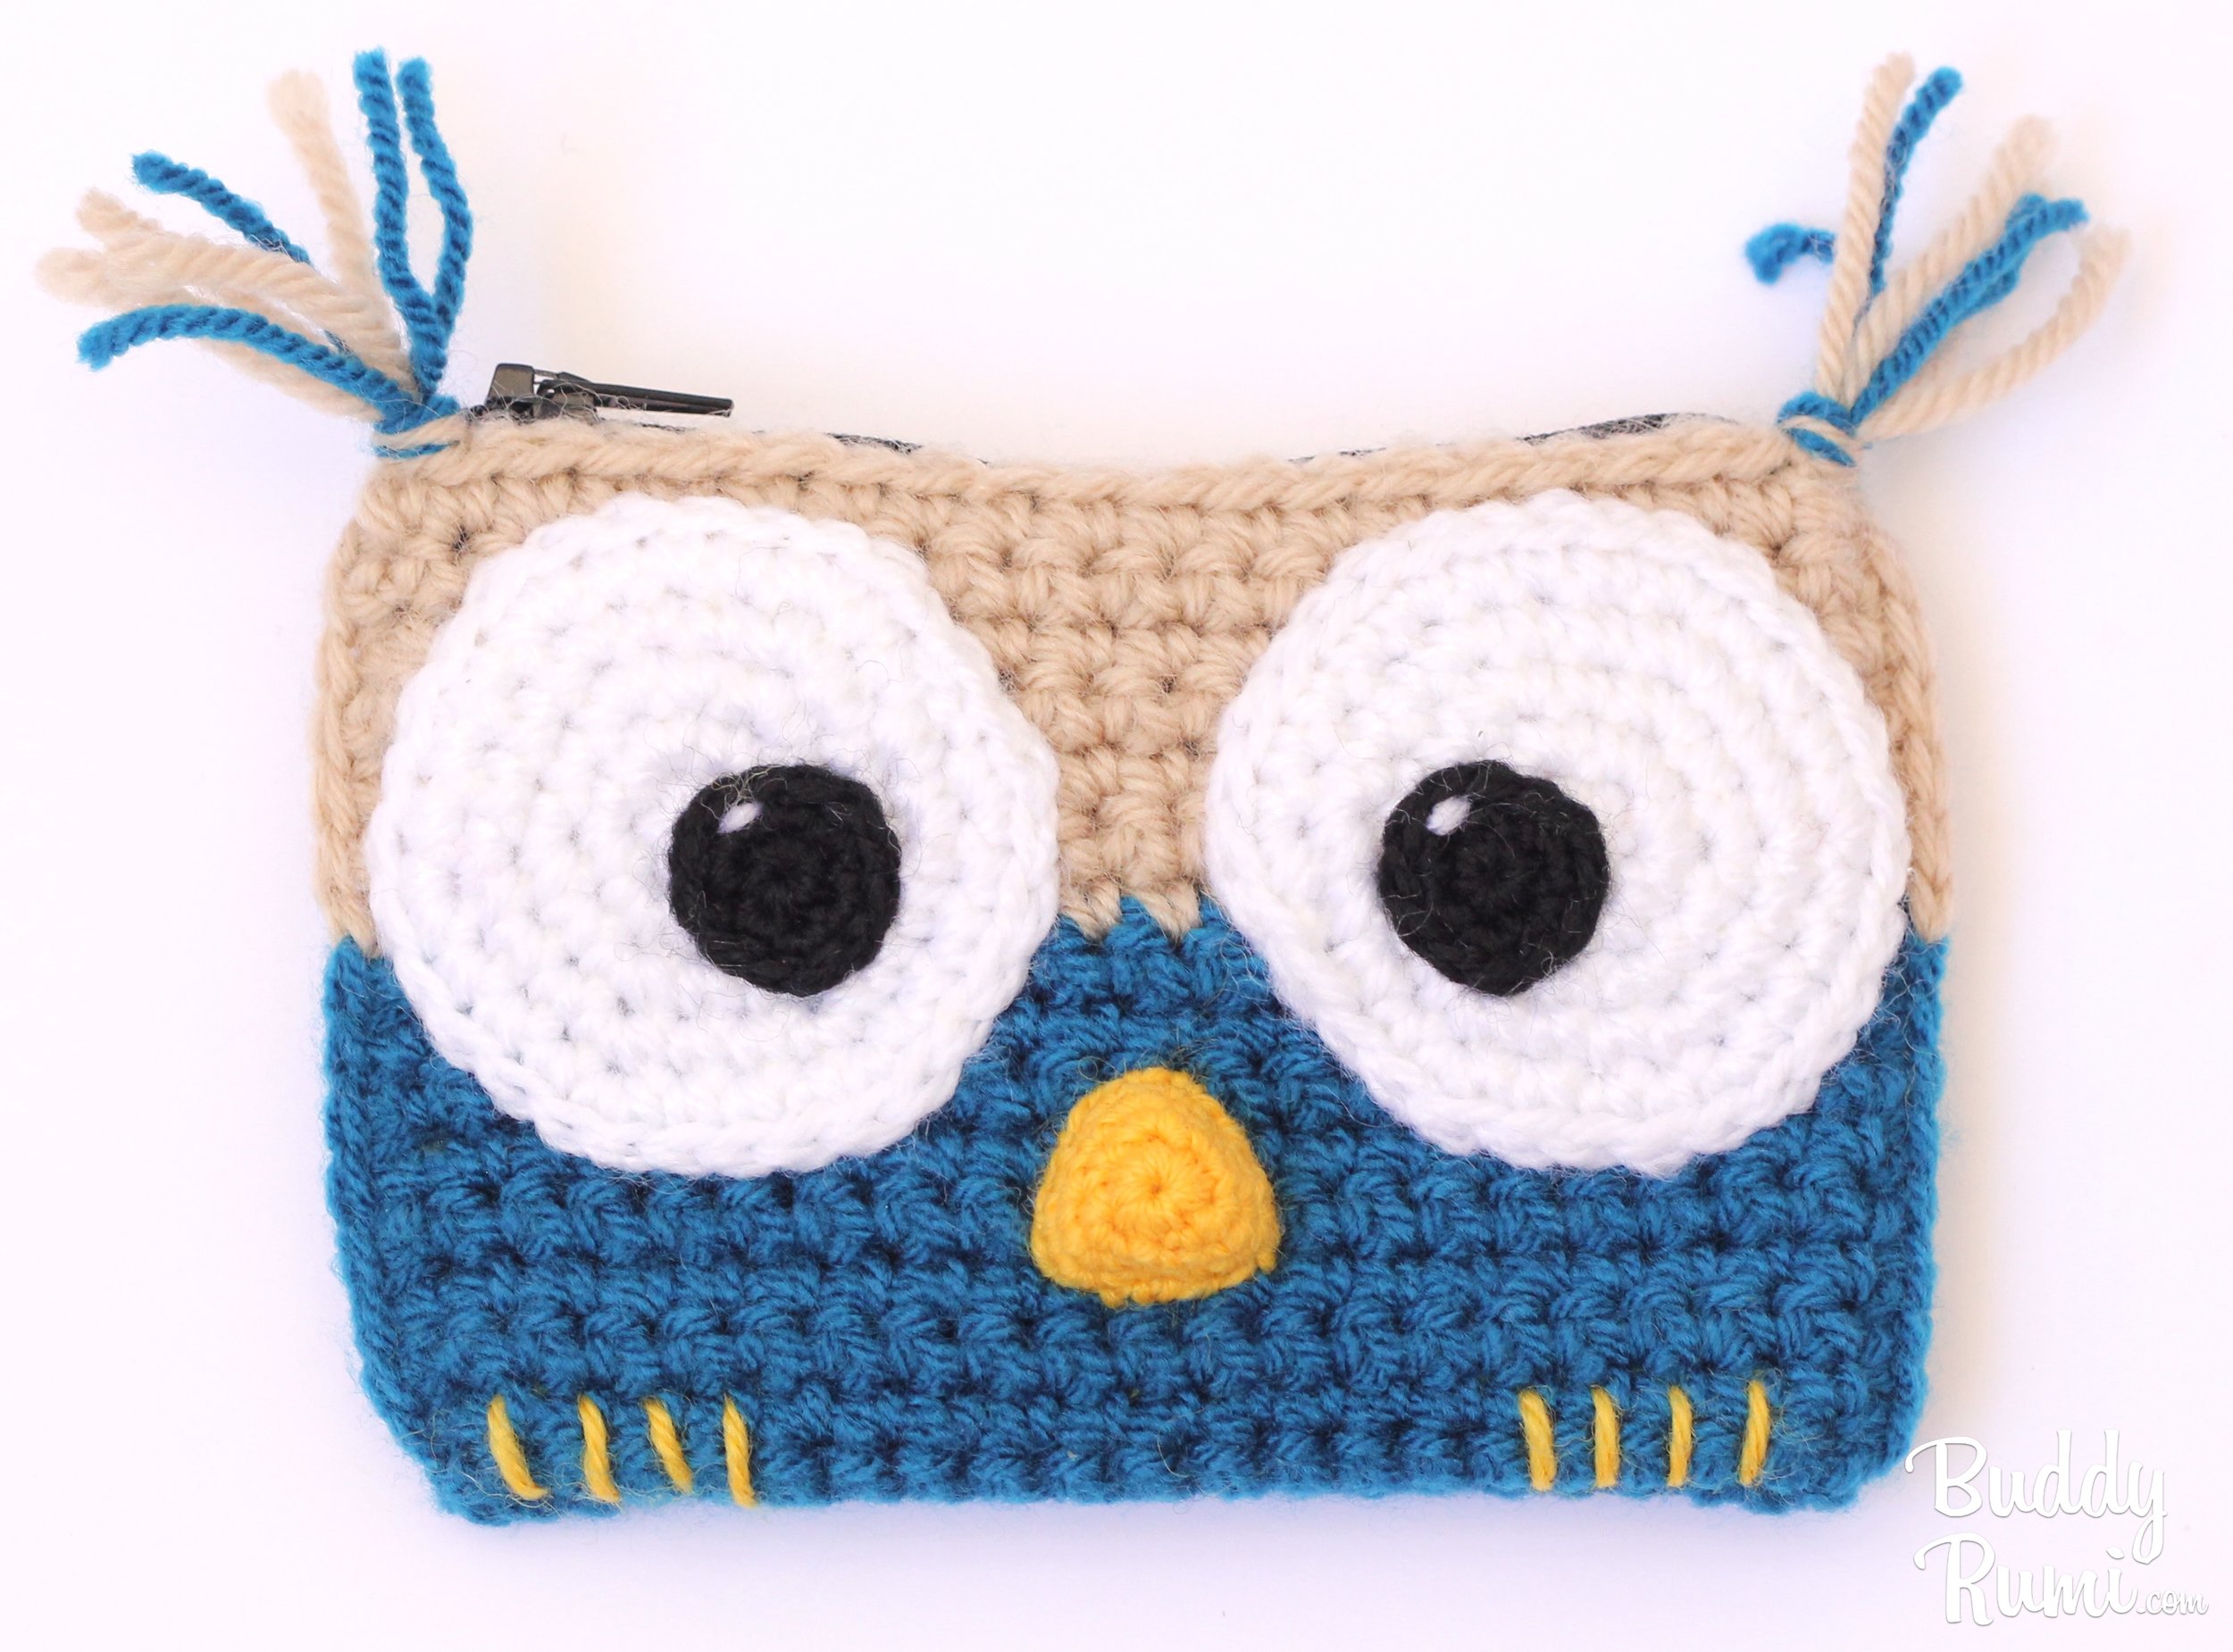
And if you want you can make the pupil even bigger just by adding another round, like I did for Mr. Owl. =)
Hope you find these helpful! =D