
How to... Make Curly Hair with Acrylic Yarn
The technique I talked about last time called for 100% wool yarn but what if you don't have 100% wool yarn? So I set myself the goal to find a way to get the curly hair with acrylic yarn. =)
I tried out four new different ways and used the same technique as last time, now with acrylic yarn, as the control. Then I recorded the result, left it alone for 8 hours and took pictures once again for comparison.
All the needles used in the different experiments are 5,5mm (0,22 inches) knitting needles.
The Control: Wet Acrylic Yarn
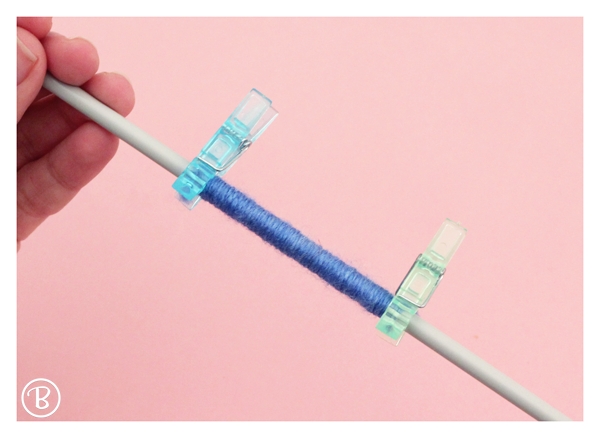
I wet the yarn with water and squeezed out the excess. I wrapped the yarn around a knitting needle, secured it with clothespins and let it dry.

1. With this method I got loose curls.
2. As you can see, after eight hours the curls were much looser.
Experiment 1: Wet Acrylic Yarn with Glue

I wet the yarn with water and mixed in a bit of dry clear white glue. I squeezed out the excess and wrapped the yarn around a knitting needle. Secured the yarn with clothespins and let it dry.

1. With this method I got tighter curls but the yarn felt rough and stiff.
2. After 8 hours the yarn still held the curls.
Experiment 2: Acrylic Yarn and Heat Gun
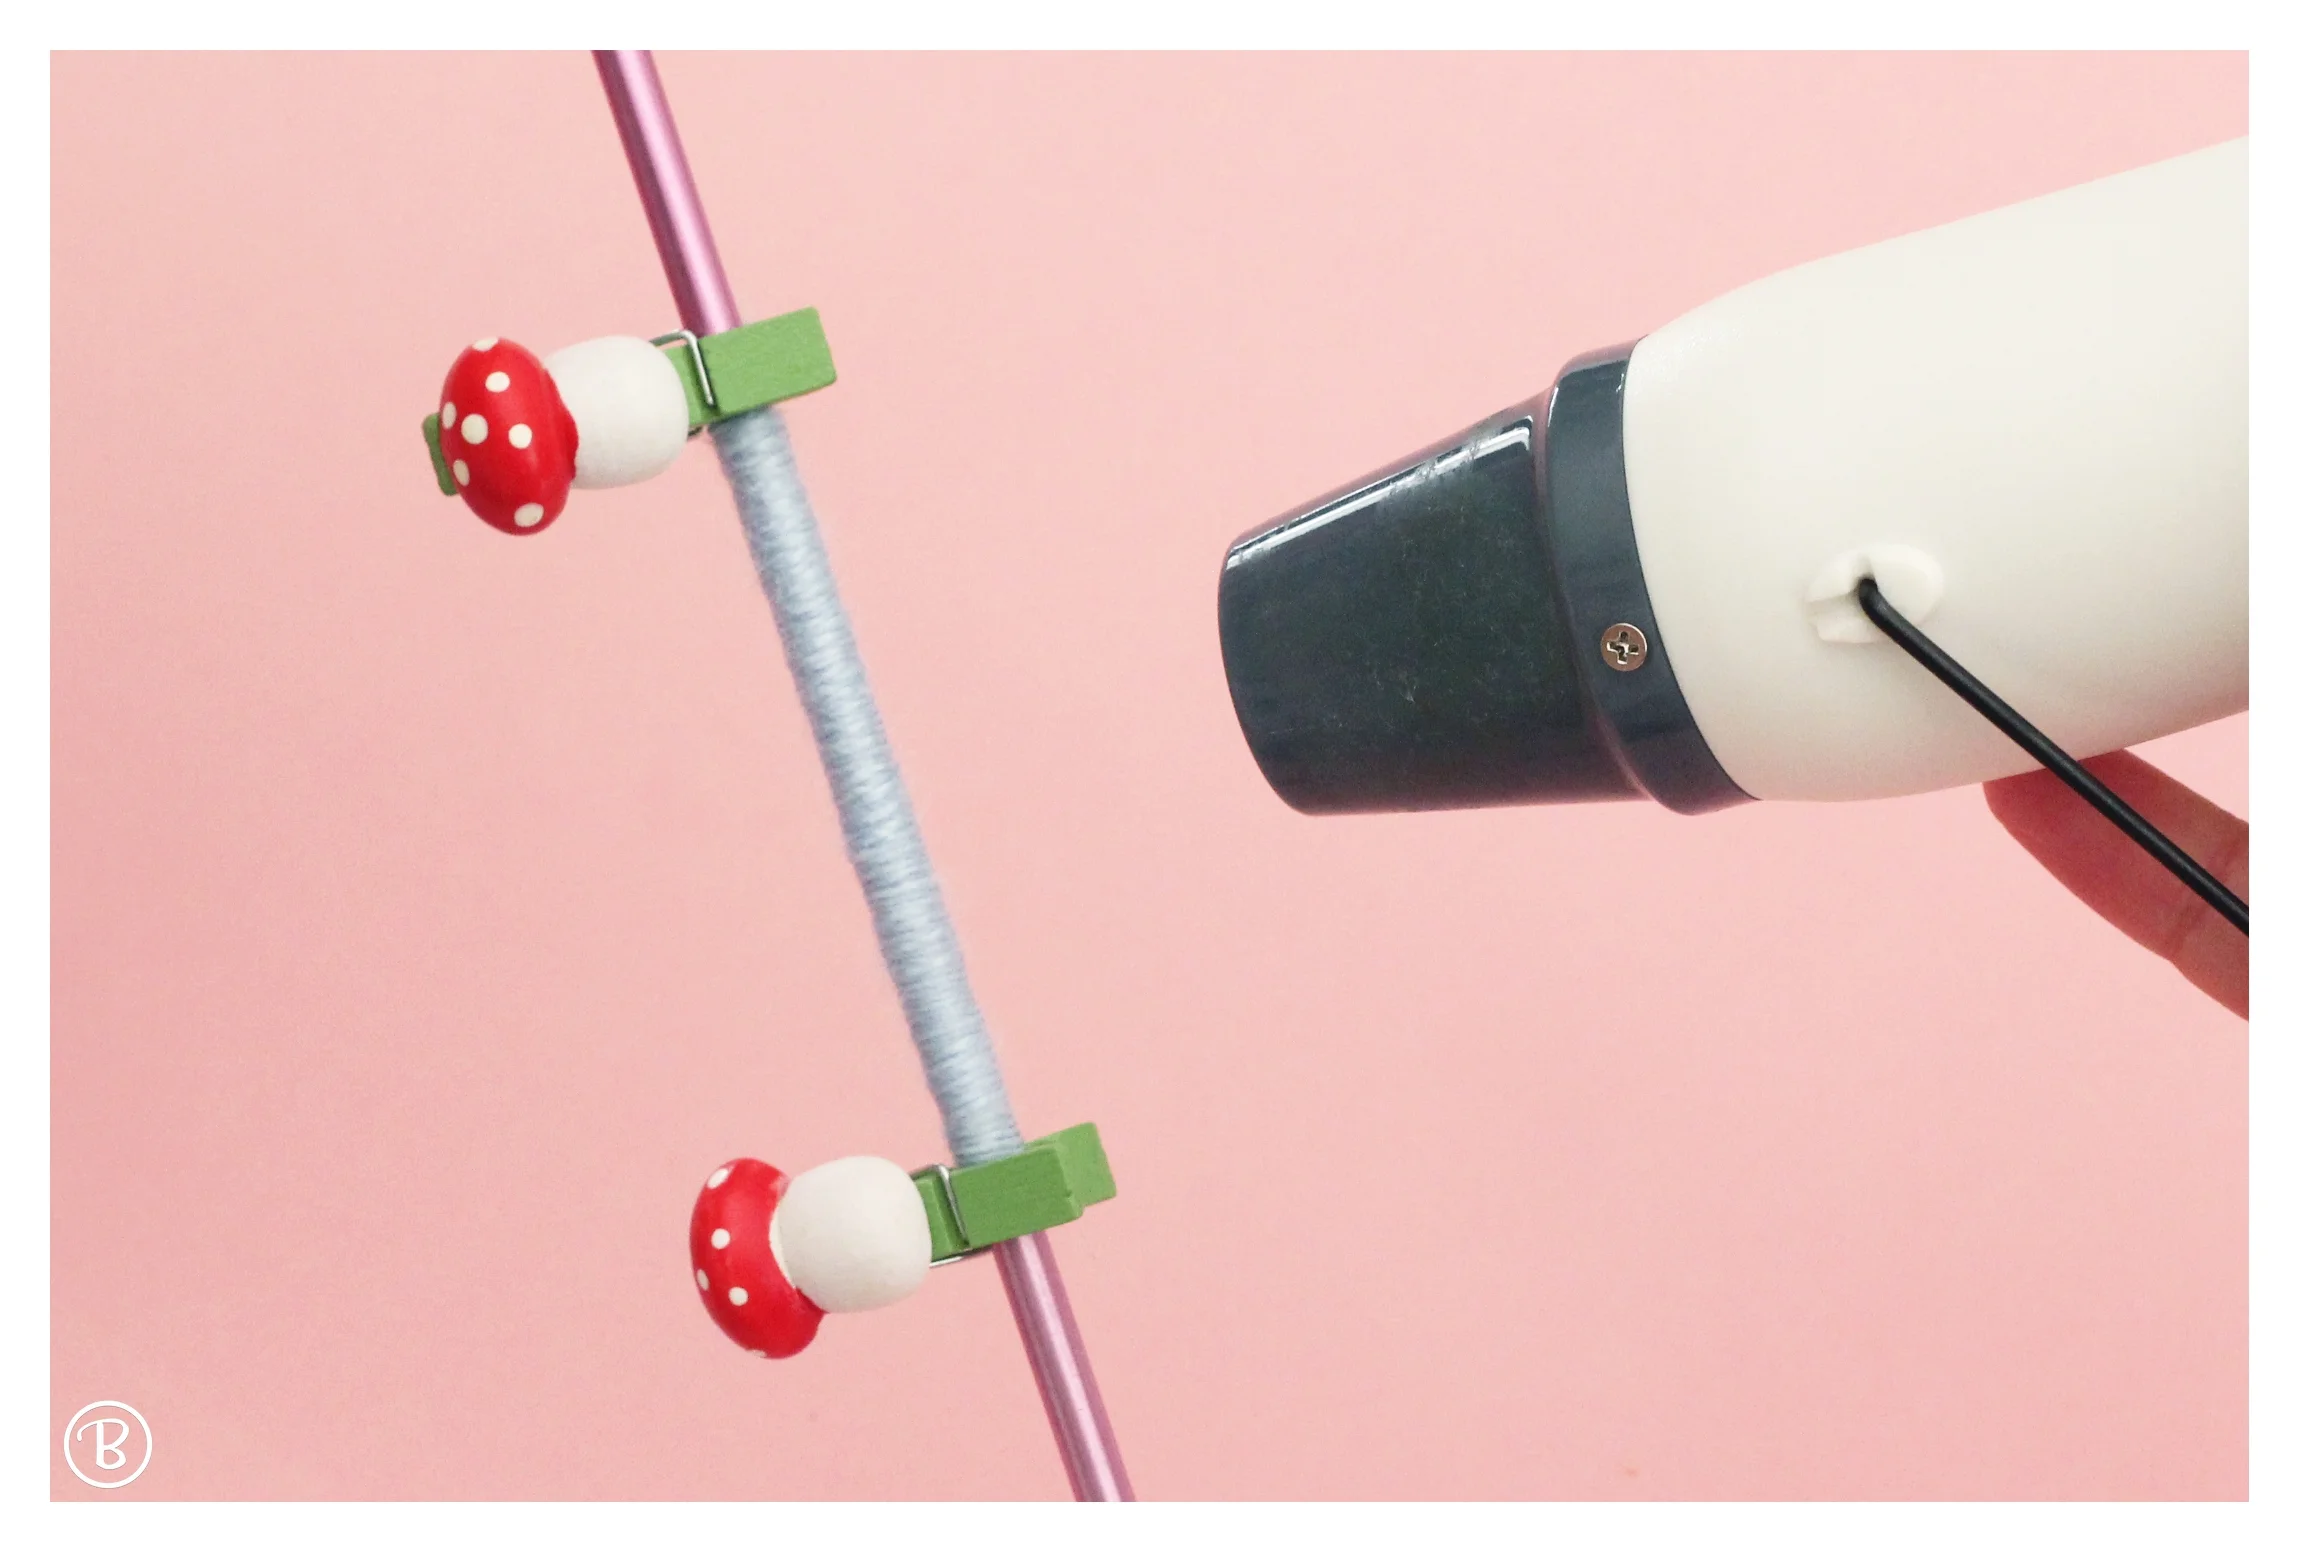
I wrapped a length of acrylic yarn around a metal needle and secured it with wooden clothespins.
I used the heat gun on the yarn never holding it in the same place and with a few inches between the yarn and the heat gun to avoid melting the yarn.
Use a tissue to hold the needle to avoid getting burned.

1. This method gave me a really neat and tight curl.
2. After eight hours the yarn still held the curls.
Experiment 3: Acrylic Yarn and Steam from Iron

I wrapped a length of acrylic yarn around a metal needle and secured it with wooden clothespins.
I set the iron to maximum quantity of steam and pressed the steam button hitting the yarn with the steam.
Do not touch the yarn with the iron to avoid melting the yarn!

1. With this method I got a really tight and neat curl.
2. After eight hours the yarn still held its curl.
Experiment 4: Acrylic Yarn, Steam from Iron and Single Crochet

I worked a length of yarn in single crochet.
I set the iron to maximum quantity of steam and pressed the steam button hitting the yarn with the steam.
Do not touch the yarn with the iron to avoid melting the yarn!

1. This method gave me a really tight curl but more messy than the previous ones.
2. After eight hours the yarn still held the curls.
Conclusions
All the new ways held the curl for the eight hours.
The method with the glue, despite holding the curls, turned the yarn rough to the touch and stiff, without bounce. Maybe if using a little bit less glue or diluting it in water before putting it on the yarn, it wouldn't come out so rough and stiff. Another one to try... =)
Experiments 2 (heat gun) and 3 (steam and needle) gave the same results, a bouncy, neat and tight curl and the texture of the yarn remained soft.
With the experiment 4 (steam and single crochet) I also got a bouncy and tight curl with the texture of the yarn remaining soft, but this time I got a messier curl.
My favorite methods were the ones where I used the heat gun and steam.
Depending on the look we want to achieve we can chose between steam+needle or steam+single crochet.
What are your favorites?