
Pet Toys from Yarn Scraps II
As promised here is the second part of the pet toys made from scraps of yarn!
Rope to catch or pull

The rope is made using the Kumihimo technique, and if like me, you don't have a Kumihimo loom, here's how to make one:
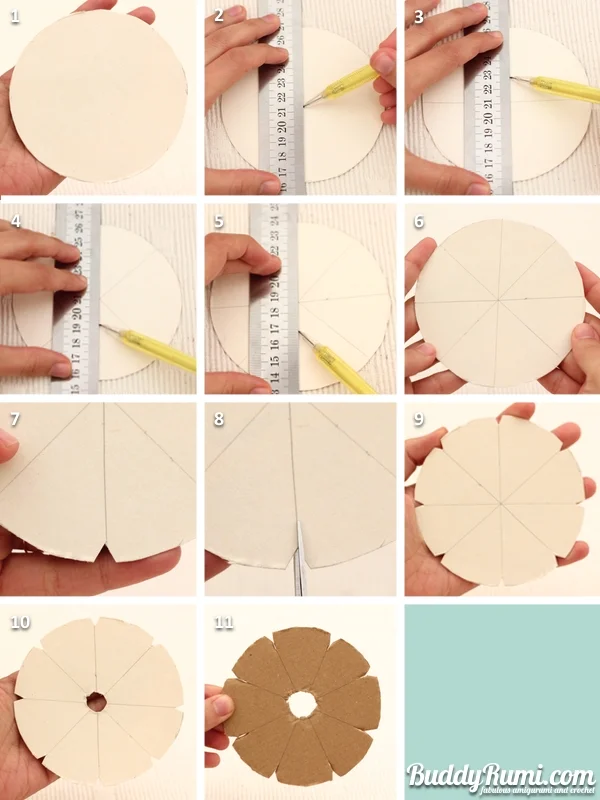
1. Cut a circle from cardboard with a diameter of about 10.5cm (4.13 inches).
2. Draw a line dividing the circle in half.
3. Turn the circle 90º and draw another line dividing the circle in 4 equal parts.
4. Turn the circle 45º and draw another line.
5. Turn the circle 90º and draw another line.
6. The circle should be divided into 8 equal parts.
7. Cut out a little triangle at the end of the line.
8. Cut a slit on top of the line.
9. Repeat steps 7 and 8 for all lines.
10. Cut a hole in the center of the circle big enough for the yarn to pass through.
11. To make the loom for the t-shirt yarn rope I used a stronger cardboard and made a bigger hole in the center.
Making the rope
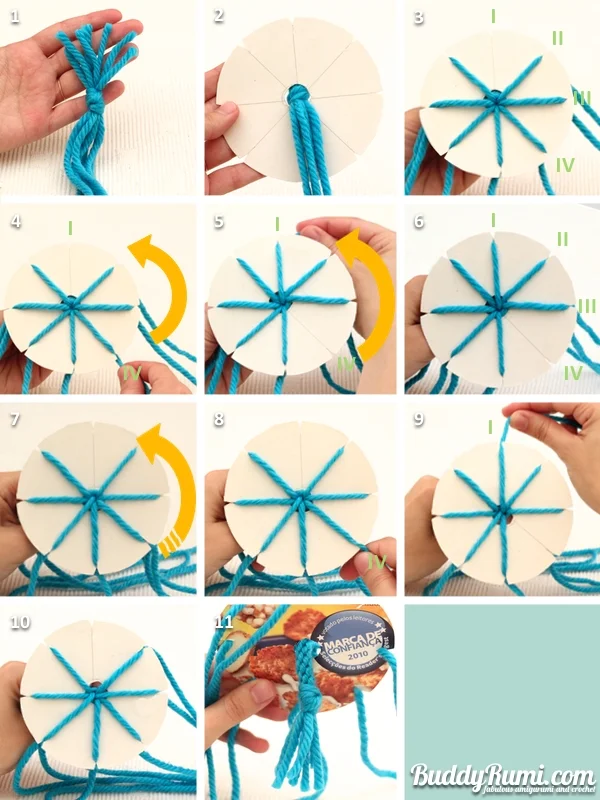
1. Cut 7 pieces of chunky yarn 40cm (15.75 inches) long and tie a knot holding all the ends together.
2. Insert the knot through the hole in the loom, leaving the long parts of the yarn to the front.
3. Secure the yarns in the slits leaving one empty. The empty slit is always on the top (marked as I in the picture). Counting clockwise the other important slits are II, III and IV.
4. Grab the yarn in slit number IV.
5. Move the yarn to slit number I.
6. Now slit number IV is empty.
7. Turn the loom counterclockwise until the empty slit is on top.
8. Grab the yarn in slit number IV.
9. Move the yarn to slit number I.
10. Turn the loom counterclockwise until the empty slit is on top.
11. Keep repeating steps 8 to 10 and the rope will start to grow on the other side of the loom.
Keep going until you can't secure the yarn in the loom anymore. Take the rope out of the loom carefully without letting go of the ends. Tie a knot securing all ends.
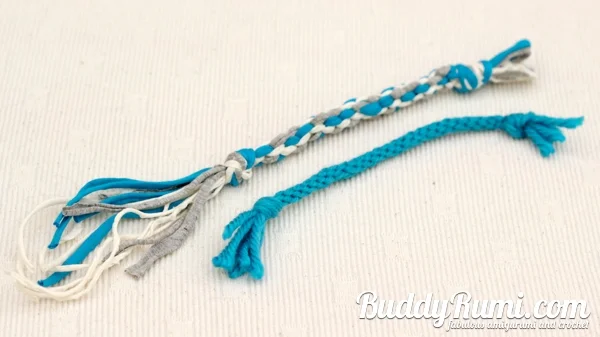
The ropes are fun for cats and dogs alike! =D
I made a thicker one with t-shirt yarn. I used two pieces of yarn for each slit. The t-shirt yarn is more durable and is easier to wash. I left the ends long on this one because Leeloo likes to catch them!
Cat Teaser Wand

For this one you will need a plastic wand from an old toy. Leeloo is ruthless with hers and the original feathers are long gone! =)
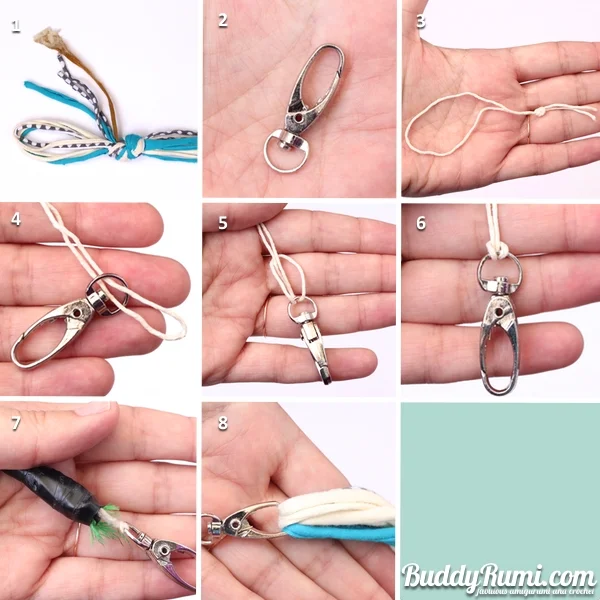
1. Cut several pieces of t-shirt yarn 1.80m (1.97 yards) long. Fold them in half, tie a knot making a loop at the end where they were folded. I included some pieces that were half the length, but I didn't fold those.
2. The clasp is optional but it makes it easier to take the t-shirt yarn from the wand whenever it needs to be washed. The clasp I used has a base that swivels 360º which allows more fun movements to be made.
3. Cut a piece of string, more or less 20cm (7.87 inches) long, fold it in half and tie the ends together.
4. Insert the string into the base of the clasp.
5. Insert the ends of the string through the loop on the other side of the base of the clasp.
6. Pull the string securing it to the base of the clasp.
7. Secure the string to the base of the wand with tape. I used electrical tape which is sticky, malleable and strong.
8. Insert the t-shirt yarn loops into the clasp.
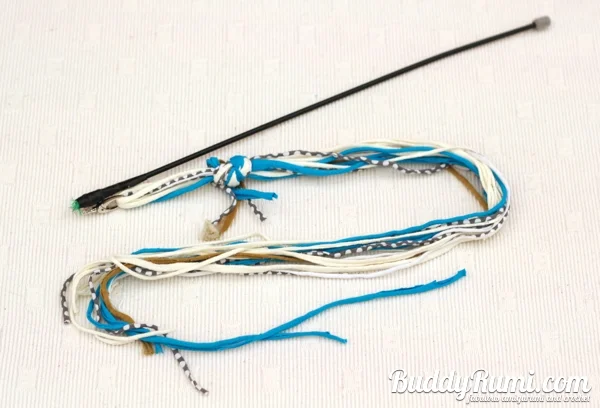
A simple and fun toy for our furry friends!
This is Leeloo's favorite toy!!! Wherever it is, if she wants to play, she will get it, drag it around the house and drop it at mine or hubby's feet! =D
And because there can't be enough of Leeloo, here is the video of her playing with her toys again! =D