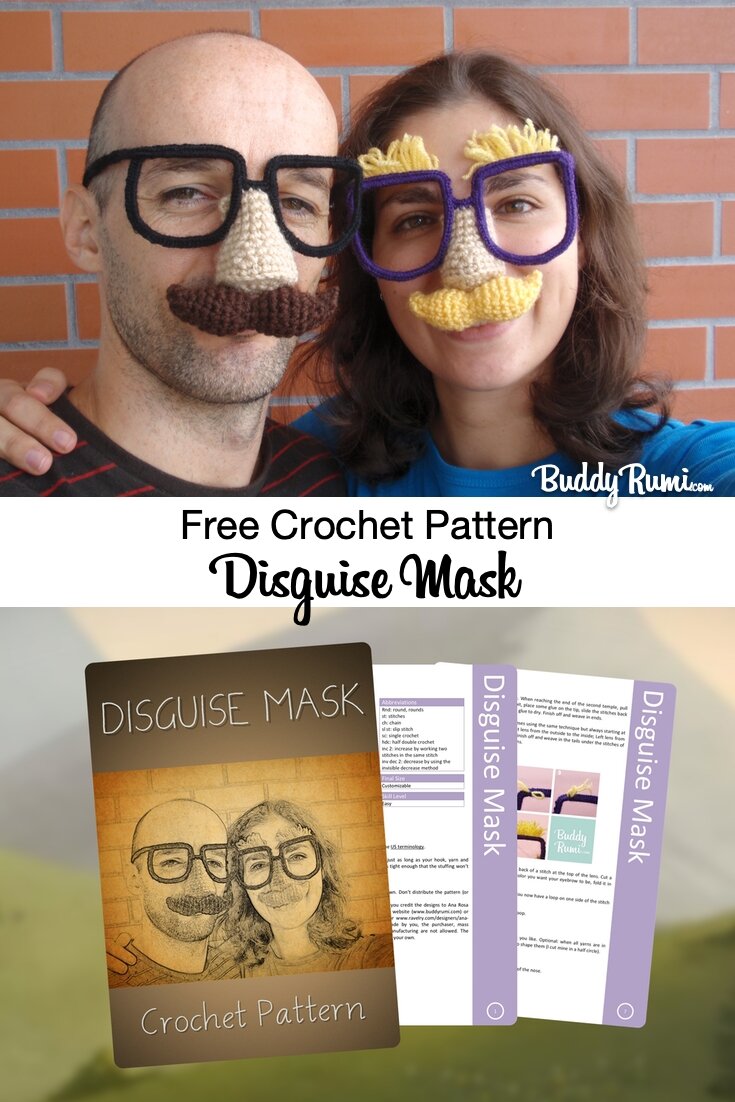
Free Amigurumi Pattern: Disguise Mask

Don't have a costume for Halloween? Fear not, I've got a super quick and fun disguise for you to crochet!
Materials
Medium weight yarn in flesh toned color
Medium weight yarn in brown or yellow
Light weight yarn in black or purple
3,5mm hook / US E4 /UK 9
2,5mm hook /UK 12
Wire
Stuffing
Tapestry needle
Optional:
1,5mm hook
Abbreviations
Rnd: round, rounds
st: stitches
ch: chain
sl st: slip stitch
sc: single crochet
hdc: half double crochet
inc 2: increase by working two stitches in the same stitch
inv dec 2: decrease by using the invisible decrease method
Finished size: customizable
Skill level: Easy
About:
The terminology used in this pattern is the US terminology. Gauge is not important.
Nose
Using the flesh toned yarn and the 3,5mm hook.
The nose is worked in rows. All stitches are worked in both loops unless indicated otherwise. To make the bridge of the nose I use a technique that I call the Traveling Slip Stitch, this technique is explained below after the instructions for the nose.
Rnd 1: 3sc in Magic Ring, ch1, turn (3st)
Rnd 2: (inc 2) x 3, ch1, turn (6st)
Rnd 3: (1sc, inc 2) x 3, ch1, turn (9st)
Rnd 4: (2sc, inc 2) x 3, ch1, turn (12st)
Row 5: Back loop only - 12sc, turn (12st)
Return row: 12slst, ch1, turn (12st)
Row 6: 5sc, sc2tog, 5sc, turn (11st)
Return row: 11slst, ch1, turn (11st)
Row 7: 5sc, sc2tog, 4sc, turn (10st)
Return row: 10slst, ch1, turn (10st)
Row 8: 4sc, sc2tog, 4sc, turn (9st)
Return row: 9slst, sch1, turn (9st)
Row 9: 9sc, turn (9st)
- Repeat last return row and Row 9 until you reach the desired height for the nose. For the black mask I crocheted until row 13 and for the purple mask I crocheted until row 12.
- Finish off and weave in ends
Traveling Slip Stitch
I use this technique to get from one side to another of the piece and to get an even texture.

1. Begin with the stitches required in the pattern.
2. Turn work.
3. Slip stitch across (return row).
4. Chain one and turn work.
5. Insert hook under the top two loops of the single crochet row and under the slip stitches in the back.
6. Complete the single crochet as usual.
7. Single crochet across.
8. Back view: the slip stitches are hidden under the single crochets.
Moustache
Using the brown or yellow yarn and the 3,5mm hook.
The moustache is worked in continuous rounds. Don't join rounds at the end. You may want to use a marker to indicate the beginning of the round.
All stitches are worked in both loops.
Rnd 1: 4sc in Magic Ring (4st)
Rnd 2: inc 2hdc, 2slst, inc 2hdc (6st)
Rnd 3: 2hdc, 2slst, 2hdc (6st)
Rnd 4: (1sc, inc 2) x 3 (9st)
Rnd 5: (2sc, inc 2) x 3 (12st)
Rnd 6: 12sc (12st)
Rnd 7: (3sc, inc 2) x 3 (15st)
Rnd 8: (3sc, inv dec 2) x 3 (12st)
Rnd 9: (2sc, inv dec 2) x 3 (9st)
- Begin to stuff
Rnd 10: (1sc, inv dec 2) x 3 (6st)
Rnd 11: (1sc, inc 2) x 3 (9st)
Rnd 12: (2sc, inc 2) x 3 (12st)
Rnd 13: (3sc, inc 2) x 3 (15st)
Rnd 14: (3sc, inv dec 2) x 3 (12st)
Rnd 15: 12sc (12st)
Rnd 16: (2sc, inv dec 2) x 3 (9st)
- Stuff
Rnd 17: (1hdc, inv dec 2hdc) x 2, 1slst, inv dec 2slst (6st)
Rnd 18: 4hdc, 2slst (6st)
Rnd 19: (inv dec 2sc) x 2, 2sc (4st)
- Close and leave long tail.
- Weave in the tail making it come out in one of the points where it will be touching the nose.
Glasses - Frame
Use an old pair of glasses as reference.

1. Measure the length of the glasses' temple.
2. Bend the wire 90º and measure the width of the lens.
3. Make the shape of the first lens.
4. Mark the height of the bridge of the glasses and bend the wire at that height. Mark the width of the bridge of the glasses.
5. Bend the wire 90º upward and then 90º at the height of the second lens.
6. Make the shape of the second lens.
7. Bend the wire 90º backwards and measure the length of the second glasses' temple.
8. Frame complete.
Glasses - Covering the Frame
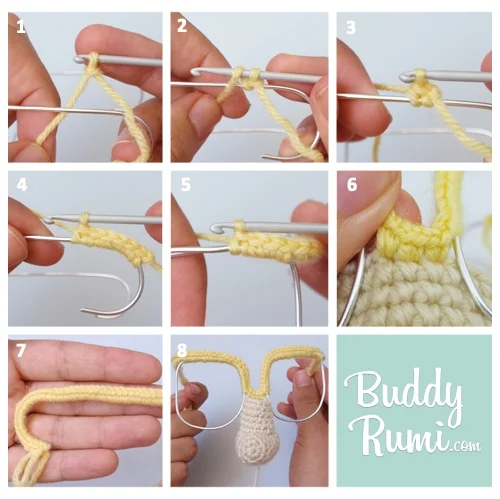
1. Make a slip knot on the 2,5mm hook using the light weight yarn in the color you want for you frames. Place the working yarn behind the glasses' left temple.
2. Yarn over catching the yarn under the wire and pull up a loop.
3. Complete a single crochet.
4. Single crochet until you have more or less 6 single crochets. Place a little bit of glue in the tip of the glasses' temple, slide the stitches to the edge and let the glue dry.
5. Continue to single crochet. On the top of the lenses cover both wires with the single crochets.
6. When getting to the bridge of the glasses place the nose close to the bridge, insert the hook on the 4th stitch of the top of the nose and complete a single crochet. Work 2 single crochets from the 4th to the 6th stitch of the top of the nose (Total of 6 stitches to secure the nose).
7. Continue to single crochet along the interior side and top of the lens and along the second temple. When reaching the end of the second temple, pull the stitches back a little bit, place some glue on the tip, slide the stitches back to the tip and wait for the glue to dry. Finish off and weave in ends.
8. Cover the rest of the lenses using the same technique but always starting at the left of the lenses: Right lens from the outside to the inside; Left lens from the inside to the outside. Finish off and weave in the tails under the stitches of the top and inside of the lens.
Eyebrows

1. Insert the 1,5mm hook in the back of a stitch at the top of the lens. Cut a 10cm piece of light yarn in the color you want your eyebrow to be, fold it in half and catch it with the hook.
2. Pull the yarn under the stitch. You now have a loop on one side of the stitch and 2 tails on the other.
3. Make both tails go through the loop.
4. Pull tails to secure the yarn.
5. Place as many pieces of yarn as you like. Optional: when all yarns are in place cut them at different lengths to shape them (I cut mine in a half circle)
Finishing
- Attach the moustache to the bottom of the nose.
Download PDF pattern
Your super fun disguise is completed! Try it on Pinterest!
This pattern is an original pattern by Ana Rosa of BuddyRumi. Please do not claim this pattern as your own. You may keep a copy for your own personal use and feel free to use the items made from this pattern however you wish, but remember to credit me as the pattern designer. Please do not reproduce this pattern anywhere else, if you wish to share it post a link to /blog/2012/10/25/disguise-mask-free-pattern.html
Thank you!